My objective, build a wheelhouse 6X12 NO bunks, 6 holes max distance apart, light weight and warm. It started in the Fall of 2013 when my friends Rockwood 8 tent trailer fell apart from rot. He didnt know how to get rid of it so I took it off his hands. First task, strip it to bare frame, than the snow came. Kept many of the parts to recycle. I no longer desire to sleep in one of these - MN winter resort cabin runs $30-$40 per person per night much better deal.
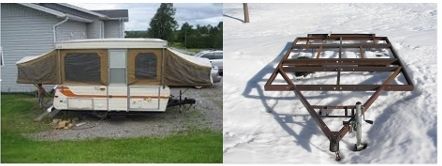
Summer project 2014, added some steel to extend it to 12 feet and added the V front. Found some 3 formed 8 channel 11ga on Craigslist for $5 per stick.

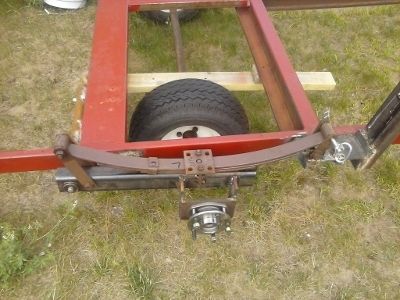
Next challenge, add some wheels. Many houses I looked at had a wheel spindle welded to a ¼ 3x2 steel tubing with a single spring sticking out of one end. Problem is there is no way to adjust camber or toe-in to this configuration and looking at tires on many trailers, they wear out quickly usually on the outside tread. I went with a wheel hub assembly, same one on my 06 dodge grand caravan, and welded a heavy steel bracket to the steel tubing. This also allowed me to extend the wheel hub 4 lower go give the house more clearance. They are bolted on so shimming is possible. Also used the original springs from the tent trailer. One note, the steel I used on the bracket holding the wench is too light. Suggest 4" standard channel 5.4Lb. which will be replaced this summer. (The tire in the picture is the original axel on 2x4s to the frame allowing me to move the frame to cut the lawn)

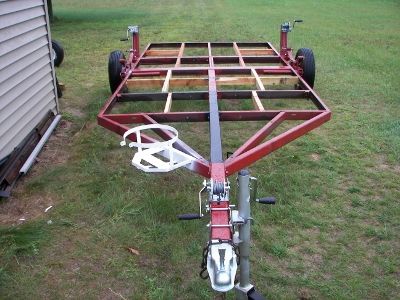
Next, cut out the center of the frame from tongue to wheel mount frame and added a 3x3 square tube 11ga and the part which allows the tongue to be lowered. The wood on the frame is to add support for the ½ plywood floor.
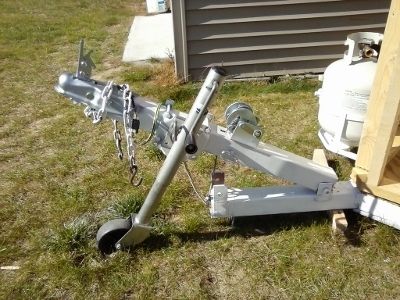
Tongue up and down
Put green treat on plywood bottom side of frame and standard plywood on top with 3 of pink poly insulation between the two layers of plywood. (6 holes are shown) The wire is for trailer lights. My next unit I will sandwich a 3/4" poly between plywood sheets and only attach it to the top of the frame. Commercial units made this way.

I used 2x3s for the frame, mostly for added insulation and strength. Best way to get straight 2x3's is to buy 2x6 lumber and cut them in half with a table saw. Besides that a 2x6 is cheaper than two bowed 2x3's. I both glued and screwed the frame verses using nails.
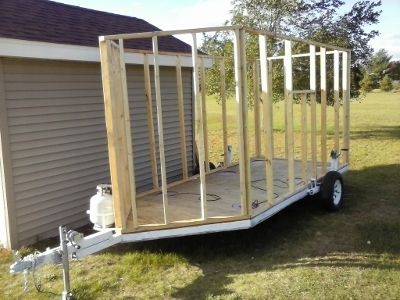
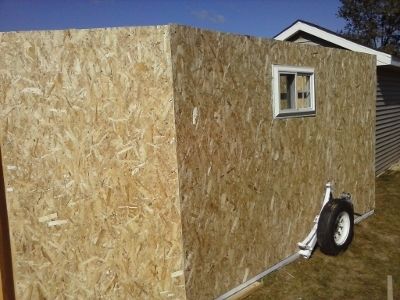
Outside sheeting is ¼ OSB - Its just as strong as plywood, light and inexpensive and it works well. Use lots of good quality construction glue on frame and screws about every foot. Only downfall OSB MUST be treated or covered. ¼ OSB fully glued and attached with screws made it rock solid.
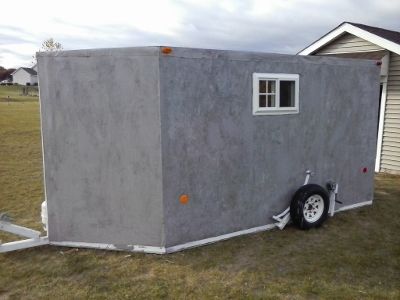
I used some RV roof rubberized with aluminum particles added. It is thick and must be stirred frequently to insure the rubber and aluminum is well mixed while applying. It sells for about $9 per gallon. I put 5/8 OSB on the roof and covered it with Ice and Water barrier, same stuff used on the roof of all homes in MN. Its self adhesive and really sticks. Entire outside coated with the RV Roof product.
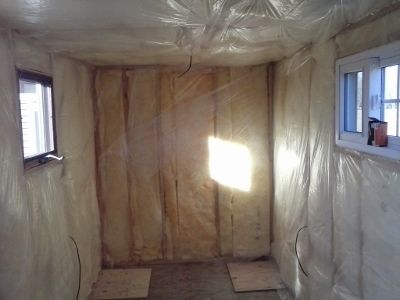
I wired it with 110v A/C with generator inlet on front V and fused 12v DC for lights - Cig. Lighter outlets for electronics. Insulated with fiberglass bat insulation and plastic moisture seal.
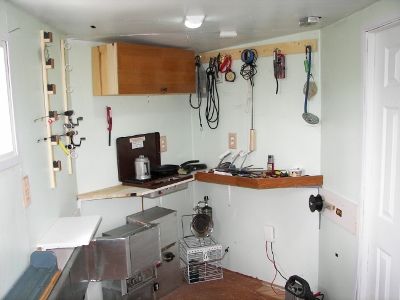
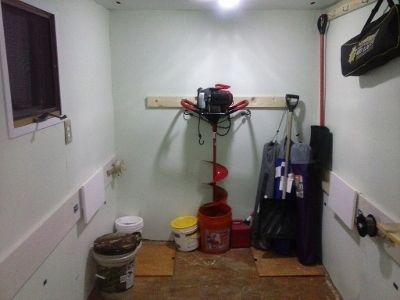
I used 1/8 hardboard underlayment on the inside (sold at Home Depot) and painted it white. Put in some creature comforts, drop down shelves, old camper 2 burner stove, bunch of coat racks, rattle reels on hinges, fish measure board, and some heat. Here is the completed front and rear views. The lights are same as the light it up post I did in March.
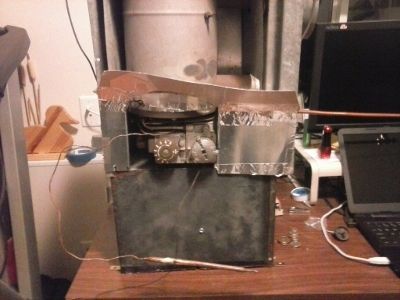
To heat the unit I found an old Pickup Camper Hydro Flame convection heater on Craigslist for $20. It has a mercury thermocouple for temp control and requires no power. It was rusty, had a bird nest in the exhaust some mud dauber nest in the heat chamber. With some cleanup, fired it up and it worked like a champ. I added an 8 fan on the bottom of the unit and some 2"x12 duct work to make it forced air. I control the fan with a thermo switch I found on ebay from China. Temp range from -50f to +235f. Themo sensor is attached to the outside of the heat chamber. I put an access door on the ducting to allow the furnace to work if for some reason I lose power. Its 9000btu and keeps the house quite warm +70 inside with outside temp at -18 at LOTW in Jan.

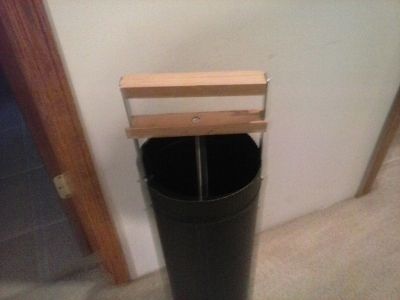
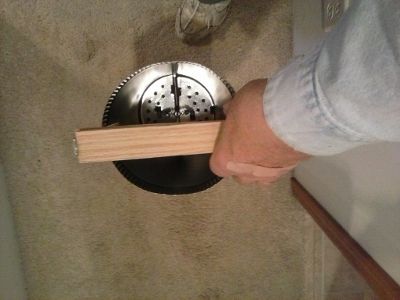
Side note: built a slush remover using an 8 black stove pipe. Squeeze the handle to close the catch plate at bottom of tube. Works great and cost less than $10
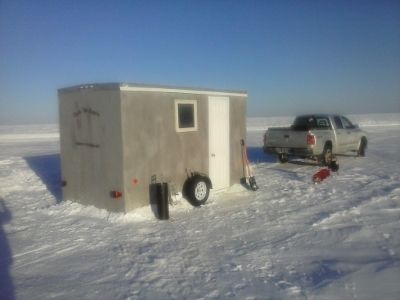
Lake of the Woods, Jan 9, 2015
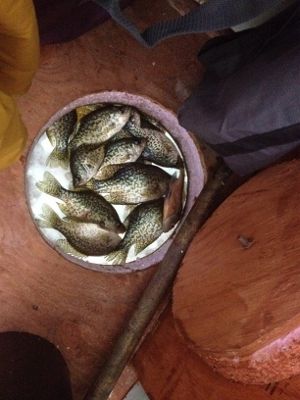
First Northern and a few crappie with my son on Coon Lake, MN. Non drilled hole great refrigerator.
Click picture to see video. Nice size for MN pickled Northern.


