Author Topic: Bait Tank 101  (Read 19617 times)

FRESHBAIT

  • Guest
Bait Tank 101
« on: Dec 14, 2012, 02:47 PM »
bump

FRESHBAIT

  • Guest
Re: DIY Bait Tank
« Reply #1 on: Dec 15, 2012, 11:33 PM »
 let me cover some of the basics of what goes into a bait tank.

Filtration and Aeration!!!   A cheap way to do that is with a Corner filter especially if you only intend to keep a small amount of bait say in a bucket or small storage tote.
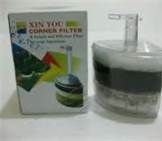
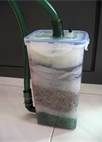
 
Corner Filter

If you put a box filter in the corner where its most convenient, it becomes a corner filter. Somehow, more people refer to this kind of filters as corner filters than box filters so we'll use the term corner filter here. Corner filters come in different shapes and sizes, but the concept is the same.

1. Air is pumped using an airpump into the corner filter

2. air bubbles rise along a passageway

3. rising air bubbles pushes water out of the passageway

4. water is drawn in to past the filter media contained in the box to replace the displaced water

Corner filters are actually for biological filteration. The wool at the water intake is used only to prevent premature clogging up of the micropores of the corner filter. In deployments where only wool/sponge is used and no porus bio media is used, the wool/sponge serves as the media for beneficial bacteria to grow on. Corner filters are not effective for mechanical filteration as the suction force is not strong enough to move solid wastes.

Corner filters are actually effective filteration provided the bioload it is supporting is small. Due to the limited amount of bio media a box filter can hold, it cannot provide enough surfaces to support a large bioload tank.

The advantage of using box filter is that it provides aeration and filteration at the same time. It is an effective way to provide filteration for a number of small tanks, you only need a strong air pump with air tubes going to all the tanks with corner filters.

Another advantage of corner filters is that they do not have a powerheads. Due to this, corner filters are very useful for tanks that need to keep the temperature cool. Different powerheads heat up the water to different extents, but without powerheads, plus the air bubbling, tanks powerered by corner filters are substantially cooler.

One mistake to avoid if you are using corner filters with fully wool is to keep changing the wool once it looks dirty. As mentioned earlier, corner filters are biological filter. When porous bio media is used, the wool actually acts as the bio media. If you throw out the 'dirty' wool, you are throwing out the beneficial bacteria. People who makes this mistake will find that the corner filter is a piece of junk. The reason is simple, the beneficial backteria never got the chance to do their work if they get replaced every time they establish.

The second mistake is that when used to support more bioload than they can handle, the aquarists have to use water changes to complement the filteration. It is essential to use pre-dechlorinated tapwater. If pure tapwater is put into the tank followed by antichlorine, the already limited amount of beneficial bacteria in the tank will be affected. It is essential to pre-dechlorinate the replacement tapwater in a bucket or pail before introducing them into the tank. This procedure is less important with tanks using other kinds of filters with a lot of bio media, because the beneficial bacteria is spread out. When some of the beneficial bacteria is killed, other unaffected beneficial bacteria can reproduce to replace them. In a corner filter, all the beneficial bacteria in the limited amount of bio media can get wiped out in an improper water change.


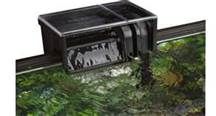
Another commonly used filter system used is the Hang On Back Filter (HOB)

Hang On Back (HOB) Filters are like internal filters except that they are hanged externally on the back.

The advantage of HOB filters is that they are space saving and does not take up space inside the tank. There is also good surface agitation and water circulation because of the water flowing in from the top on the water surface.

The disadvantage of HOB filters is that they usually have very limited space for housing bio media. Also, most of them require using specially made filter pads for mechanical filteration. In the long run, it can be costly as those filter pads are small and does not last long before they need replacing.


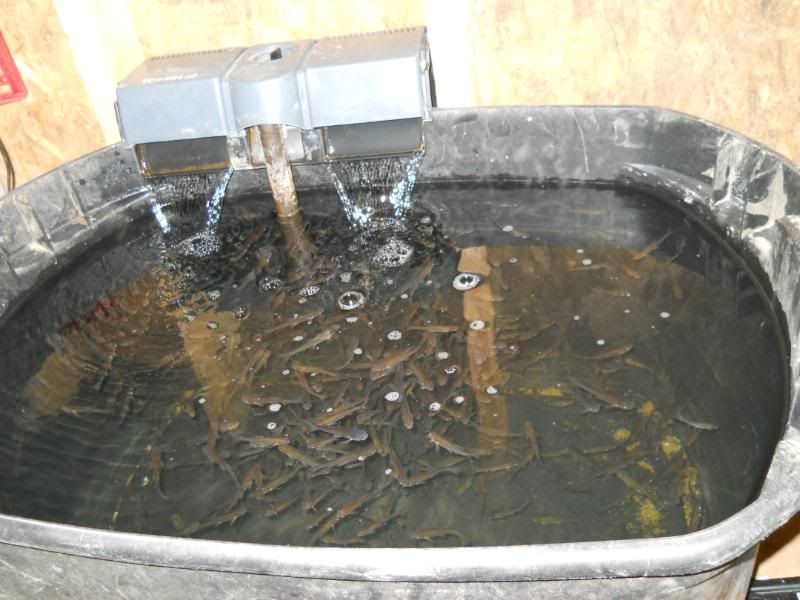
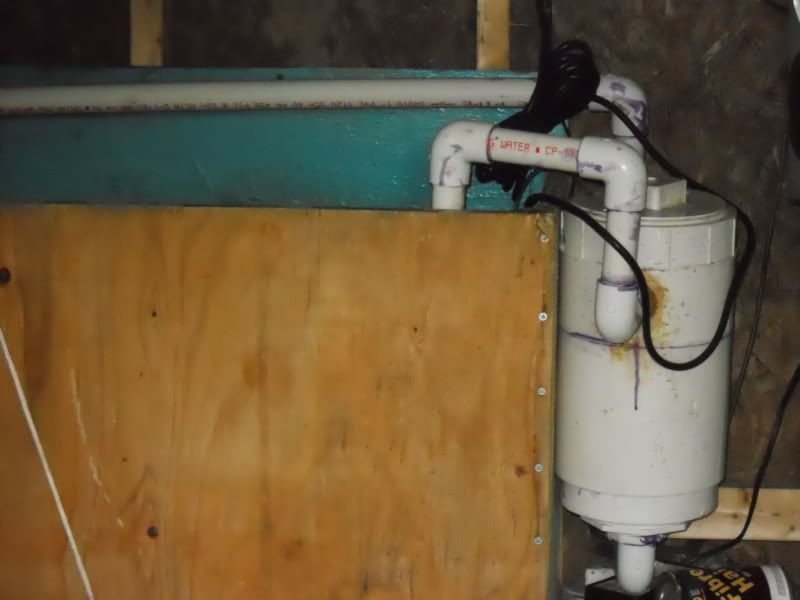
Next are canister filters.  I know of quite a few members that are using these style filters for their bait tanks

Canister Filter

If you take an internal filter, increase its filter media compartment, make it watertight and connect it to your tank using two water tubes(water in+water out), you have a canister filter. While caninister filter is a relatively newer type of filter, like all filters it has it's advantages and disadvantages and is not necessary the best.

One advantage of the caninister filter is that it increases the total water volume of your aquarium system. This is a always a good thing, because a bigger water volume means a lower concentration of harmful byproducts of fish food and waste (such as dossolved organic compounds). Also, a bigger water volume means the water is more stable with less fluctuations in temperature and water parameters. Another advantage is that since it is situated out of the tank, your fish has more swimming space and also your tank looks 'cleaner' with less equipment in it. If the water outlet is connected to a rainbar, it will also aerate the water as well.

The disadvantage of caninisters is the hassle of doing regular maintainance. As a result, many users of caninisters do not maintain them as regularly as they should. This causes uneaten food and waste to collect on the mechnical filter (wool). Without washing or replacing, these debries decay and break down on the wool. the result is that the waste is just decaying in a different place. Instead of decaying in your tank, it decays in your filter. The impact on the system is a higher bioload because these wastes break down into extra ammonia, nitrites and nitrates when they should be removed from the system even before they break down. As you can see, caninister are better used for biological filtration. This makes it very suitable for a type of aquarium that produces little solid waste and uneaten food, the natural aquarium (aka planted aquarium/planted tank).

Note: There has also been cases of leaks causing a minor flood on the floor of the home of some aquarists so if you do get a canister filter, go for a good one so you don't have to worry about it when you go on vacations.


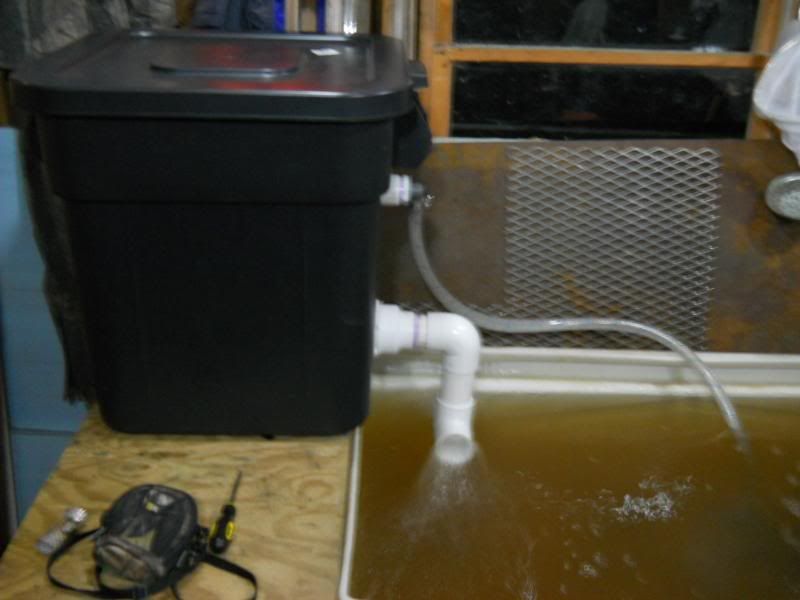
What I commonly refer to as a gravity filter is also known as a Over Head filter in most aquarist circles.
Overhead Filter (OHF)

Overhead filters works by situating the filter media above the tank water surface. Water is pumped up to above the filter media using a water pump or powerhead, which then flows pass the filter media and re-enters the tank by gravity.

There are 2 very big advantages of using overhead filters. Firstly, beneficial bacteria are able to work very effectively due to the excellent air/water interaction at the filter media. Secondly, it is very easy to do maintainance. The lid can be opened and the wool replaced in seconds without turning off the power supply. Uneaten food and solid fish waste can be easily and regularly removed before they can break down, reducing the bioload on the system.

There is enough gas exchange between the water and air at the water inlet and outlet zones such that aeration with air pump is not necessary and in fact redundent in most situations where the tank is not being seriously overstocked. Water reentering the tank from the top also effects good water circulation in bringing water with dissolved oxygen from the water surface down to lower regions.

The disadvantage of the overhead filter is that the pump take up space inside the tank although the media is above the tank. The water pump and tube channeling water upwards can also look unsightly and visually obtrusive. (There are some types of overhead filters that have the pump above the water surface where water is drawn up using a vertical pipe, but be sure to get one from a reputable brand if you get this type. There has been real and documented cases where they overheat and cause fires, even burning down the house of some victims.)

Another disadvantage is that should the connection between the water tube and the filter box be loosened and disconnected, the tube could actually start channeling water outside the filter box onto the floor. If your water pump is placed on a low position inside the tank, most of the water could be drained out and cause a minor floor on the floor besides the impact on your aquatic livestock.


There are other types of filters out there such as stackable Over head filters, Sumps, Internal overflow sump.  Pretty much any aquarium/pond style filter system can be adapted to be used with a bait tank because basically that's all your creating is a aquarium.  Your stocking rates as far as fish per gallon of water in a bait tank are going to be extremely higher than what is recommended for an aquarium of the same size.   Thats where your filter will come into play to ensure that it can handle the bioload. 
 

Three types of Filtration
Mechanical, biological, and chemical


Mechanical Filtration
Mechanical filtration is incorporated into most filters so that solids such as uneaten food, dead plants, solid fish waste and suspended particles can be effectively removed from the tank. Without mechanical filtration, biological filtration would need the solids to rot and break down, resulting in extra load on the biological filter. Mechanical filtration usually acts as the first stage of filtration in a filter. This is why sometimes it is also called a pre-filter.

Mechnical filter is essential because it:

Enables solid waste to be removed so that the water has less suspended particles and look more clear
Reduces the workload on the beneficial bacterias through exported waste from the system.
Prevents clogging up of biological media. (Bio media are very porous so that they have a larger surface area. If these pores get clogged up, then the surface area is decreased and less beneficial bacteria can be housed. )
 

Mechanical filter media includes

filter wool
filter sponge
scrubber
filter paper
 

They all come in different shapes and sizes. If you want to save cost, you can buy them in bulk from your supplier because they don't have an expiry date and it is just a matter of time before you need them. In fact, it might even save you some transport costs of buying them in several trips each time they run out. If you have access to a bigger store with a wider variety and range of products, you may even be able to find them in large sheets. You can then cut them to size to suit your filter.

Caution: Some sponges used in mattresses or pillows or toys have anti-mold, anti-fungus or anti-bacteria chemicals on them that are harmful to your biological filtration and your fish! So be careful if you are going to be scrounging up your own filter material. Depending on the quality of the material, you may be able to wash and reuse mechanical filters a few times before they deteriate too much and need to be replaced. Filter sponges and scrubbers can be washed and reused many times but filter wool tend to break down fast and have to be replaced. If you use filter paper in your system, replace and throw away the old piece when it is full. Don't wash them because it is impossible to get all the super fine particles out. You would only loosen some of them and let it go back to your water if you do!

Arrangement

Mechanical filters should always be arranged so that the water passing through meets the coarser filters first before the finer filters so that the filtration is more efficient. (eg. filter paper should always be at the last stage of mechanical filtration before the water goes to bio filter) Mechanical filtration is the physical removal of waste from the water using something to trap the solid particles. Mechanical filtration cannot remove dissolved waste chemicals. Mechanical filtration needs to be regularly washed or replaced. Otherwise, the trapped particles can either clog up the water flow or break down and bypass the filter.if you put the course filter above the finer filter, the waste load is distributed evenly. As a result, you would need to change the filter less frequently because different filters are filtering different sized particles.If you arrange it such that the finest filter is above, all the waste is trapped by the first layer. As a result, it becomes "saturated" fast and you will need very frequent maintenance. If the filter with larger pores are below the fine filter, whatever particles that could squeeze through the fine filter will not be trapped by the coarser filters below it.

Biological filtration

Biological filtration is the removal of waste chemicals by the action of beneficial bacteria living in the bio media. When the water is passed through the media, the beneficial bacteria consumes ammonia and converts it to nitrites and then to nitrates. Bio filtration is the best filtration and it does not need replacing. In fact, the older your bio filter, the more established it is.Biological filtration is the removal of harmful waste chemicals that is produced by fish waste and uneaten food in the aquarium. These waste products causes the rise of ammonia in the water. Ammonia is very toxic in high levels and it is a common cause of fish deaths in new tanks for people who fail to keep ammonia levels in check.

For biological Filtration to be set up we need

A compartment that water flows through
Bio media for bacteria to establish and grow on
Beneficial bacteria

The main thing in bio filter is the beneficial bacteria. Without the beneficial bacteria, there is nothing to carry out the bio filtration.
The process where the beneficial bacteria consume chemical waste and converts them into less harmful chemicals while multiplying in numbers to establish themselves is called cycling. When the bacteria has grown to numbers sufficient to convert all excess chemical waste so that ammonia levels and nitrite levels is zero, we say the tank has cycled.
Flow rate and Beneficial Bacteria
The main consideration of flow rate for beneficial bacteria is that your pump should be able to deliver the water to them fast enough. The higher the flow rate is, the better it will be. A a general guideline, the flow rate should be big enough to cycle the water through the biological media 4-5 times per hour.
There is some rumors that a high flow rate can impact on the ability of the bacteria to process the nitrogenous waste. However, it is not a concern because assuming that beneficial bacteria cannot do well in a high flow area, they can still live on the inside surfaces of porous media which makes up the bulk of the total surface area available to them. (Flow rate is only a concern in a denitrator that uses a coiled air tube where the only area that the beneficial bacteria is growing on is on the inside surface of the coiled air tube where it is directly affected by the flow rate.)
What is more important than flow rate is the way the water flow. In a proper biological filtration setup, water is channeled to flow through the media evenly. One common mistake fish keepers make is to deploy the bio media in such a way that water flows around it instead of through it.
We must not forget that water flows using the easiest path it finds. Using holding bags to contain media often create gaps in between bags, allowing water to flow past the sides of the bags and little through the media. If media bags is to be used, the most efficient way to deploy them would be to have the bags closely touching all the sides of the filter chamber.
iological Media (Bio media)

Other than the beneficial bacteria, the most important thing would be the biological media. Bio media is the 'land' that beneficial bacteria lives in, grow and multiply.

Anything that does not rust nor leak harmful substances into the water can be used as bio media because beneficial bacteria is not choosy. They can grow on anything that they can attach themselves to. In fact, these bacterias are on your aquarium walls, gravel, decorations, plants and even on your fish!

Due to space constraint in the filter compartment, a good bio media provides a large surface while occupying a small space. Therefore, good bio media is made of porous materials because they give a very large surface area.
If there is no space constraint, then as long as they provide enough surface area for enough beneficial bacteria to grow on, such that they keep your nitrogenous waste under control, they are good bio media!

 Common bio media are:

plastic bio balls
ceremic rings
lava rocks
 
You may be thinking, wait a minute, plastic bio balls are not porus! True, they are not porous and they do not have as much surface area as porous materials. However, if you have a large bio media compartment and do not have a tight space constraint, it is good to use bio balls because their advantage is that they are able to provide a lot of air (oxygen) for the beneficial bacteria if they are not submerged in water.
Another advantage of plastic bio balls is that they don't get clogged up because their surface areas are made up of relatively large gaps and not fine pores like ceramic material. When a ceramic material gets clogged, all that vast surface areas is gone!
Due to this reason, you should always have a good mechanical pre filter in place to provide mechanical filtration before the tank water reaches the bio filter.
 
Important Note on Prefiltering!

If you do not use a prefilter (mechanical filter) you can still get good results AT FIRST. This is because if you have porous bio media, they can trap dirt and debris and work like a mechanical filter. The only problem is while you can wash or throw away your prefilter(i.e. wool) easily, you cannot do the same to your bio media otherwise you will destroy the beneficial bacteria colonizing on them.

Comparing Biological Medias

If you compare different bio medias OVER A PERIOD OF TIME all of them will give you the same result. The differences are
Beneficial bacteria can work better in some media because the surfaces on the media are more exposed to oxygen rich water.
Different amounts of media is required for different media because of different surface area they contain. (A more porous media with smaller holes/pores have more surfaces , but most surfaces have less access to oxygen rich water that is required for beneficial bacteria to work efficiently).
The only difference is that different media require different maintenance because some clog up easier than others.
Deployment of media is important. A media that is above the water level so that the water flows over it is more efficient. This is the more oxygen rich environment for the media.
If you compare a porous and non porous media side by side, the porous media will always show better results in the short term. This is because the micro holes and tunnels in the porous media traps tiny particles in the water. This in effect polishes the water so it looks more clear. This effect will slowly taper off as the pores of the media gets clogged up.

Chemical Filtration
Chemical filtration is the use of chemical process to filter the water. It can be in the form of solutions that bind particles together so that they can be picked up by the mechanical filter, or in solid form such as activated carbon and zeolite. Chemical filtration have a 'limit' of how much they can filter. When they are "full", they need to be replaced.
 
Some common chemical filtration is

Activated Carbon - removes dissolved organic substances
Zeolite - removes ammonia
 
Chemical filtration should only be used in emergencies and not as a permanent filtration that you keep replacing regularly.
 Chemical filteration and their uses:

 Activated Carbon

Activated carbon can be thought of like a vacume cleaner, taking in everything that it comes across. It is useful for removing medications from the water after you cure your fish and you do not want the medication to linger in the water. (Medications is generally harmful to aquarium plants and the biological filter, do not use medications unless absolutely necessary! You should cure your fish in a separate hospital tank whenever possible. In extreme cases where you have to medicate your main tank, always remove medicine traces after your fish are cured! Learn about curing fish diseases here)
Other than removing medications, it is also useful in removing color caused by driftwoods or dried leaves etc.

Activated carbon also removes ordous. However, note that a healthy aquarium should not have ordors! Don't treat the symptom without treating the source!

Zeolite and other ammonia removal chemicals
Zeolite is used to remove ammonia from water. There are also other chemicals that removes ammonia from aquariums, however for this section we use zeolite to represent zeolite as well as those other ammonia removal chemicals so this will be more readable..
As said earlier, zeolite should not be used as a permanent solution to your aquarium filtration even if you replace the zeolite regularly when they get 'full'. They should only be used in temporary installations where you don't biological filtration in place, for example temporary feeder fish tanks, quarrantine tanks, hospital tanks etc. You don't want to have bio filtration is these tanks because you often need to medicate these tanks. When you medicate, you'll destroy the bacteria colonies and wreck your bio filter anyway. And being temporary tanks, the bacteria colonies does not have any supply of waste chemicals to sustain the bacteria colonies when their fish are moved into your main tanks.
When you use zeolite, you are artificially removing ammonia (which reduces nitrites as well since nitrites is converted from ammonia). As a result, you 'trick' the biological filter into thinking that you have a smaller bioload than you actually have. As a result, your beneficial bacteria colonies downsizes as the 'excess' bacteria staves and dies.
While this is fine while your zeolite is hungrily absorbing ammonia, what happens when they are full and will not absorb anymore? When this happens, your beneficial bacteria will have to slowly multiply to increase their capacity to process the suddenly increased ammonia and nitrites. Before they have multiplied sufficiently, your aquarium will have these excess waste chemicals in the water. How much a spike it will cause depends on how much zeolite you were using.

Instead of replacing zeolite and wasting your money and time, why not let your beneficial bacteria handle it for FREE!!!


FRESHBAIT

  • Guest
Re: DIY Bait Tank
« Reply #2 on: Dec 16, 2012, 12:10 AM »
If I could stress one thing on a bait tank is that it takes time to cycle. And to remember CYCLE! CYCLE! CYCLE!!

There are two types of Cycling. 
     with fish and with out fish known as fishless cycling

Cycling actually refers to the nitrogen cycle. It is a process where waste products from your fish converts from harmful chemicals to harmless chemicals, naturally!

Getting Started Cycling Tank.

The following describes the chemistry changes that occurs in your new aquarium before it balances naturally.

During cycling, the fish inside will be stressed because and they may die or fall sick before the balance is reached. To cycle the tank, you should use cheap and hardy fish because they are tough enough to handle this difficult mission! Start out with a few bait fish,  You don't want to just dump a good haul of bait into your just started bait tank to have all your hard work go belly up in a few days.

Ok I know you're on the starting line all ready to go so lets get started!

What you need:

A tank (of course)
 hardy fish
A Biological Filter setup (The term setup is used because a bio filter is not complete without established bacteria colonies. Aquarium cycling is all about establishing these bacteria. If you need help on a bio filter setup, you can refer to the aquarium filtration section.
 
Day 1

There are people who top up the tank with water and leave it for a week or two before putting the fish. Skip those wasted time! Let your tank stand for 1-2 days is more than enough! The tank does not start the cycling process without ammonia, and that comes only from fish waste! Just remember to add a correct dose of antichlorine+antichloramine to the water you use so as to remove chloramine and chloramine. Chlorine and chloramine are added by the water supply company to kill bacterias to make it safe for humans to drink. However, when we do aquarium cycling, we need bacteria to multiply to eat the fish waste, so help the bacteria! They are our friend.

Note: Bacteria that help in the cycling process are grouped together and called 'beneficial bacteria'. We want to preserve them and let them multiply in our filtration systems!

To add ammonia to the water, hardy fish should be introduced. Anywhere from two to five inches of fish may be used per ten gallons of water (any less and the tank may go through another, but smaller, cycle when more fish are added in future;(THIS IS WHAT MOST PEOPLE SEEM TO BE EXPERIENCING WHEN THEY ADD MORE BAIT TO THEIR TANKS!!!)) any more and the water condition may go beyond what your hardy fish can tolerate). Ammonia is produced from fish waste. In short, your fish eats food and converts it to ammonia.

In the first day, with the introduction of the cheap, hardy fish, there should not be enough ammonia produced to be measured because it is diluted by the volume of nice clean water. Therefore,

 All readings should be near zero.

 Day 2

Feed the fish as usual, but not too much until there is leftovers in the tank. Leftovers rot and can cause the waste levels to go out of control. Don't forget we are not changing water throughout the cycling process! (Did I hear 'yay!' ?).   I know this goes against most of what alot of us preach about not feeding your bait, but in order to cycle your tank its a must.

Remember that during cycling, we try not to change the water because we don't want to prolong the time it takes for the tank to cycle. Everytime you chance water, you are removing the waste chemicals that we need!.

Important!: Used aged water or dechlorinated water only! The smallest amount of chlorine will set you back in the cycle, especially in the beginning stages where beneficial bacteria is still in minute quantities.
If changing water is absolutely necessary, keep it small and less than 20% of the total water volume. Best if you don't change at all.
 Ammonia should be rising to a measurable amount.

 Day 3

Ammonia rises quickly to almost dangerous levels. You should see a spike in the ammonia level if you are actively testing the water. The fish in the tank should show signs of stress due to the water condition going bad.

During this period, be careful not to feed too much because the fish may lose their appetite. Put a little food at a time and only put more if the food is finished.

Also, control the amount the fish eat. You should not always feed until the fish won't eat anymore. It is generally better to keep the fish a little hungry. Especially when feeding dry pellet foods, a fish may become overfull when the food absorbs water and expands in the stomach. It is better to feed a more small meals than less big meals.

First stage bacteria are consuming ammonia and converting them into nitrite. However, as the bacteria is still very little, only a very small amount of ammonia is being converted into nitrite. As the ammonia being consumed by bacteria is less than the ammonia the fish is producing, ammonia levels in the tank continues to rise, however, at a slower rate.

 First stage bacteria are growing to become established, but the amount is still very low.

 Nitrite level is low, unmeasurable quantity.

 
Day 5

Ammonia level maxs out and starts dropping. This is because the first stage bacteria has grown in quantity to be able to consume ammonia and converts them to nitrite faster than the fish can produce them. The result is a drop in ammonia level and rise in nitrite level. During this time of maximum ammonia, less hardy fish may fall sick or even die.

If you observe your fish having difficultly coping, you may want to change some water in the tank so the ammonia is more diluted. As warned earlier, use aged and dechlorinated water only! Don't change the water if not absolutely necessary.

 Ammonia maxs and drops.

 Nitrite levels rising.

 
Day 8

First stage bacteria are now well established. Ammonia level drops at a faster and faster rate and finally to zero. Nitrite levels begin to rise faster than before. During this time when the ammonia drops rapidly to zero, you will notice the fish becoming active and happy, looking for food, fighting, getting active. This is because this is their first break from the stressful "work" in the last few days. Congrats, you are halfway there already!

 First stage bacteria well established.

 Temporary improvement of water condition.

 
Day 14

Nitrite levels has climbed to reach the maximum levels. Again, fish in the tank will start to show stress. During this time, partial water changes can be made but I don't need to tell you now, change less than 20% and use de-chlorinated water only.

 Nitrite levels maxs.

 
Day 27

During the last few days, second stage bacteria grows as they consume the nitrite and converts nitrite into nitrate. Nitrite levels continue to be elevated for several weeks.

 Nitrite being converted to nitrate by second stage bacteria.

 
Day 29

Second stage bacteria are well established. These second stage bacteria are able to convert nitrite as fast as they are produced. Nitrate levels now becomes measurable.

 Second stage bacteria well established.

Nitrate levels rises.

Day 30

Both first and second stage bacteria are now well established. Ammonia produced by fish is converted into nitrite and then nitrate with no excess because there are now enough first and second stage bacteria to process them. Congratulations! Your tank is fully cycled and ready for your fish to be put in!
 

NOTE:  You may experience that when you add more fish to your tank that you go through another cycling process

additional notes:

1. A rise in nitrate levels after the tank has cycled may cause an algae bloom. This is because nitrate is a plant nutrient. To prevent excess algae, you may want to put in some water plants to absorb and use the nitrates as they are produced by second stage bacteria. This effectively starves the algae of the nutrients they require, bringing them under control. Also, you will have happy plants!

2. Although the tank has fully cycled, it is important to continue to look after the beneficial bacteria in your tank through proper maintenance practices.


Fishless cycling with AMMONIA!!!
Using ammonium chloride: This is the other most popular way to cycle a fishless aquarium. Simply add chemical ammonia to the tank water and let the process cycle. The benefits of this method are that the tank does not cloud up with a bacteria bloom and you don’t have to look at an aquarium with dead fish on the bottom. Plus you can somewhat accurately determine the amount of ammonia being added to the tank. The drawbacks to this method are that the proper ammonia solution can be hard to find and when you do find an ammonia solution you may not be able to easily determine its concentration.

Why do you need proper ammonia? Most of the ammonia solutions that are easy to find at grocery or hardware stores are for household cleaning use. They usually contain an additive for scent or something else. Never use anything but pure ammonia. Also, many of the ammonia cleaning solutions which have a heavy ammonia order also have very high pH and the smell is ammonia gas. Over time, the ammonia is leaving the solution so the concentration is changing (getting lower). Most start out between 4 and 11% ammonia but rarely is the concentration given on the bottle, so it can be hard to figure out how much to add. If you are going to use an ammonia solution, proceed cautiously at first until you have an idea of how much ammonia is actually being put into the aquarium water. For this you need to be able to accurately measure the amount of the liquid you are putting into the water. Add some solution to your aquarium, let it mix and then use your test kit to measure the ammonia concentration in the water. You want to have an initial ammonia-nitrogen concentration of 2 to 3 mg/L (ppm). Do not go above 5 mg/L.

Whatever the source of your ammonia, the following is the way to proceed. Add the ammonia solution to the Tank so that the ammonia concentration is between 2 and 3 mg/L (but, as mentioned, do not go above 5 mg/L). Record the amount of liquid you added.  Wait 2 or 3 days and measure the ammonia and nitrite. Continue measuring ammonia and nitrite every 2 or 3 days until you start to see some nitrite. This is a sign that the ammonia-oxidizing bacteria are starting to work. Add half the initial amount of ammonia you added to the water on day 1. Continue measuring ammonia and nitrite every 2 or 3 days. Around day 9 to 12, the ammonia will probably be below 1 mg/L, maybe even 0, but nitrite will be present. Nitrite does not spike until somewhere between days 14 and 20. You want to be careful adding more ammonia because you do not want the nitrite-nitrogen over 5 mg/L as this will start to poison the nitrite-oxidizing bacteria. Add a little ammonia every few days (1/4 dose), making sure the nitrite does not go above 5 mg/L. Once you start to see the nitrite decrease, it will drop pretty fast. The cycle is completed when you can add the full dose of ammonia (2 to 3 mg/L-N) and overnight it all disappears to nitrate with no sign of nitrite. Now you can start to add fish.


My Fishless Cycling!!!
Here is how I do it,  you may or may not agree with the method.  It is also has the potential of spreading diesease through your tank. 

Find a friend who has an aquarium and have them clean their gravel using one of the those gravel vacuums, place all that cloudy, mucky looking water into a bucket and bring it home.  Next while your filter and pumps are running, stir up the contents of the bucket so that its all suspended again and pour it into/through your filter.  Make sure that you don't keep the contents of the gravel cleaning in the sealed bucket for to long as you don't want the bacteria to start dying off.   As soon as possible is my recommendation.   By "SEEDING" your filter you have basically jump started your whole process.  Just ensure that you do have some fish in the tank to keep the bacteria fed.  The first couple of hours your tank will most likely be all cloudy and there will be stuff all floating around, which is OK b/c your filter will take care of it.   Test your water ammonia, nitrates and nitrites the next day if every thing is within parameters add a few more fish.   The next day test your water again and note your water tests.   You may see a rise in some of your readings as your newly seeded bacteria have to establish themselves.   As you test your water and you see that your readings have leveled out, add more fish.  Usually in about a week or two your tank can be fully cycled and be up and running.  I have also found that if I use water from the lake or pond that my times to cycle have been reduced from the fact that there is bacteria already freefloating in the pond/lake/brook water.

FRESHBAIT

  • Guest
Re: DIY Bait Tank
« Reply #3 on: Dec 16, 2012, 12:19 AM »
I know some of this is alot of reading, but the information needs to get out there.  Hopefully some of this will answer some of your questions regarding your bait tanks and why they get all cloudy and smell bad, or why there seems to be a Foam on the surface.   Tomorrow I should be able to start on the actual bait tank, with cutting it up, and weither or not to lay it on its side, or just keep it standing up.  I'll also try digging through my thousands of pictures on the computer of past bait tanks from the super simple to I got a little bit carried away.   

Offline yellowdog4me

  • IceShanty Rookie
  • **
  • Posts: 50
Re: DIY Bait Tank
« Reply #4 on: Dec 16, 2012, 04:36 PM »
Thanks for this info and taking the time to post. Answered many questions for me. I'm surprised anything I have is still alive!

FRESHBAIT

  • Guest
Re: DIY Bait Tank
« Reply #5 on: Dec 16, 2012, 05:14 PM »
Bait fish are extremely hardy and can handle a lot of poorer water quality.   But if you take an already stressed out bait and then throw them on a hook down the hole they Re gonna either die from the shock or be to lethargic to swim.  So keeping them lively and healthy I think increases your odds at catching fish bc a lovely shimmering bait frantically swimming around will draw a lot more attention then a lifeless body just hanging there.   

Offline pdolewa

  • Team IceShanty Regular
  • ***
  • Posts: 435
Re: DIY Bait Tank
« Reply #6 on: Dec 16, 2012, 08:13 PM »
Thanks for posting all this FRESHBAIT! It has helped a lot with some specific questions I had. Have you ever used chemicals like finer shiner or better bait?

FRESHBAIT

  • Guest
Re: DIY Bait Tank
« Reply #7 on: Dec 17, 2012, 09:30 PM »
The 55gal plastic barrels that most people are using look like  this and should have the gal marks on the side.  Make sure that you flush them out real well with lots of water to ensure that there is no residual residue of what ever was in them.  Mine had a mild antibacterial, used to disinfect the milk holding tanks at dairy farms.


They will also have two threaded bungs in the top, which can be unscrewed and plumbed with your PVC to your pump, or you can even plumb a couple barrels together for a larger bait set up.


If you can't get ahold of a 55gal plastic barrel then just about anything that'll hold water can be used to make a bait tank.
Old chest freezers are nice especially if they still work as you can set them up on a timer system to turn on and off and then you can keep your water cold.
plastic totes, plastic garbage cans, 5 gal buckets, water stock tanks, old aquariums are just a few.


Once you got what your gonna use for your bait tank you have to see if it'll fit into the space that you have.  55gal bait tanks where you don't have that much room where its going to be placed can be made standing up.  I prefer to lay them down, as it gives you a larger viewing area, and water to air contact at the surface. But sometimes you have to make due with what you got.


Offline jethro

  • Team IceShanty Maniac
  • **
  • Posts: 4,128
Re: DIY Bait Tank
« Reply #8 on: Dec 19, 2012, 11:42 AM »
Following this thread here!! Thanks for info. I'm building my first bait tank and surely have some questions. I am going to start a thread of my own on the build, if you don't mind, please stop by there and maybe give some guidance if you can?
Quote- fishslap: I use a variety:  whistlin' bungholes, spleen splitters, whisker biscuits, honkey lighters, hoosker doos, hoosker don'ts, cherry bombs, nipsy daisers, with or without the scooter stick, or one single whistlin' kitty chaser

Ice safety link: http://lakeice.squarespace.com/

FRESHBAIT

  • Guest
Re: DIY Bait Tank
« Reply #9 on: Dec 19, 2012, 01:30 PM »
I've got way to many projects all going at the same time.  I'm finished with this tank and have to get my butt in gear posting pictures and doing the write up.   Anybody have any questions? About. Bait tanks in general or want to see some in particular done

FRESHBAIT

  • Guest
Re: DIY Bait Tank
« Reply #10 on: Dec 19, 2012, 01:40 PM »
I'm so bored here it is late December, no ice forming any time soon it seems like for mid west Michigan, while all my buddies in Maine are fishing already.   So with that said time go out in the shop organize my pictures and start doing some writing for this build.  And think of what I can DIY next maybe a minnow trap?

Offline jethro

  • Team IceShanty Maniac
  • **
  • Posts: 4,128
Re: DIY Bait Tank
« Reply #11 on: Dec 20, 2012, 02:02 PM »
Minnow trap! Yeah, that works for me! I'm gonna try and trap some bait soon.
Quote- fishslap: I use a variety:  whistlin' bungholes, spleen splitters, whisker biscuits, honkey lighters, hoosker doos, hoosker don'ts, cherry bombs, nipsy daisers, with or without the scooter stick, or one single whistlin' kitty chaser

Ice safety link: http://lakeice.squarespace.com/

Offline matt12

  • Team IceShanty Addict
  • *
  • Posts: 606
Re: DIY Bait Tank
« Reply #12 on: Dec 21, 2012, 12:52 AM »
hey i read "most" of your posts so far :P haha i know they are crazy long but very informative!! so maybe i skipped this.

all i have is like a 10 gal cooler, i added a drain and an airator. i change water 50% every other day or so. bait seem to be ok. i dont hold much bait really in there. maybe 2 doz max at a time.   every time i go fishing i have extra minnows  so i toss them in here. and when i need some i grab from the cooler. you get the picture. 

but my question to you is: since i change water often, am i starving my bait??  how long can they go? can i feed them something in the mean time??

its just i feel bad just leaving them in there, i know some will die, but i dont want them to starve. im sure they wont be in there for more than a few weeks MAX. but there will be times where they will be stuck in the cooler for at least a week before i sacrifice them to the walleye gods.

thanks for any info :)

Offline frozengator

  • Team IceShanty Addict
  • *
  • Posts: 953
Re: DIY Bait Tank
« Reply #13 on: Dec 21, 2012, 01:18 AM »
bump
Gator Nation

Offline jethro

  • Team IceShanty Maniac
  • **
  • Posts: 4,128
Re: DIY Bait Tank
« Reply #14 on: Dec 21, 2012, 06:48 AM »
its just i feel bad just leaving them in there, i know some will die, but i dont want them to starve. im sure they wont be in there for more than a few weeks MAX. but there will be times where they will be stuck in the cooler for at least a week before i sacrifice them to the walleye gods.

thanks for any info :)

I'm sure FRESHBAIT will chime in here soon, but it's my understanding that if you keep them cold, like real cold, 40F or so, they go into "hibernation" of some sort and they don't need to eat much if any at all. If you are just changing water and not filtering, I don't think you want to feed them at all. And like I said, keep them cool!
Quote- fishslap: I use a variety:  whistlin' bungholes, spleen splitters, whisker biscuits, honkey lighters, hoosker doos, hoosker don'ts, cherry bombs, nipsy daisers, with or without the scooter stick, or one single whistlin' kitty chaser

Ice safety link: http://lakeice.squarespace.com/

Offline matt12

  • Team IceShanty Addict
  • *
  • Posts: 606
Re: DIY Bait Tank
« Reply #15 on: Dec 21, 2012, 08:38 AM »
well, they stay fairly cool. id say under 50 probably for the most part.

Offline jethro

  • Team IceShanty Maniac
  • **
  • Posts: 4,128
Re: DIY Bait Tank
« Reply #16 on: Dec 21, 2012, 09:09 AM »
You will probably be good. They can live for months without eating if it's cold enough.
Quote- fishslap: I use a variety:  whistlin' bungholes, spleen splitters, whisker biscuits, honkey lighters, hoosker doos, hoosker don'ts, cherry bombs, nipsy daisers, with or without the scooter stick, or one single whistlin' kitty chaser

Ice safety link: http://lakeice.squarespace.com/

FRESHBAIT

  • Guest
Re: DIY Bait Tank
« Reply #17 on: Dec 21, 2012, 11:29 AM »
Matt12  sounds like your doing every thing right so far.  Thats how my bait tank obsession started.  Keep the water cold as possible, this keeps the baits metabolism slow.  I don't feed any of my bait ever.   Towards the end of the season the ones that haven't been dripped and used are getting skinny.  Mine will go 3-4months no food just fine.   If you do feed then your water quality will not be as food if you didn't feed.  All that food turns into dish poo and ammonia.  It's up to you if want to feed.

Offline matt12

  • Team IceShanty Addict
  • *
  • Posts: 606
Re: DIY Bait Tank
« Reply #18 on: Dec 21, 2012, 12:20 PM »
thanks freshbait !

i feel better now knowing im not starving my little minners'.


ill make sure to keep an eye on the water temp. im also using some Blue pellet stuff i got from the bait shop to help keep minnows frisky and what not. turns the water blueish. 

know anything on this stuff?


FRESHBAIT

  • Guest
Re: DIY Bait Tank
« Reply #19 on: Dec 21, 2012, 01:03 PM »
Finer shiner or better bait.   Both great products,  helps keep the bait with a good healthy slim coat

Offline matt12

  • Team IceShanty Addict
  • *
  • Posts: 606
Re: DIY Bait Tank
« Reply #20 on: Dec 21, 2012, 06:29 PM »
yea says somethign bout slime coat and removing chlorine.

kinda like catnip for minnows with some healthy benifits :)


thanks again for the help ^^ maybe some year ill go all crazy like you guys haha   oh wait, that means i would have to actually have fish eat my minnows lol

Offline matthewt

  • IceShanty Rookie
  • **
  • Posts: 47
Re: DIY Bait Tank
« Reply #21 on: Dec 22, 2012, 11:10 AM »
I have a chest freezer  that i acquired and started the build.  I placed a few minnows in and within 3 days they all died.  The inside is a sheet metal type material possibly aluminum.  Is this the issue?  They had an aerator going the whole time and the water is still clean.

FRESHBAIT

  • Guest
Re: DIY Bait Tank
« Reply #22 on: Dec 22, 2012, 04:34 PM »
Shock? Maybe.... The metal liner It shouldn't be an issue.  Other than maybe your tapwater is it chlorinated or well water.  Well water has little to no dissolved oxygen. 

Offline pdolewa

  • Team IceShanty Regular
  • ***
  • Posts: 435
Re: DIY Bait Tank
« Reply #23 on: Dec 22, 2012, 06:51 PM »
I've noticed that some scales settling out on the bottom of my tanks... Its not a lot just a few here and there. I just didn't know if it was normal or something I should be worried about?

Offline matthewt

  • IceShanty Rookie
  • **
  • Posts: 47
Re: DIY Bait Tank
« Reply #24 on: Dec 22, 2012, 07:24 PM »
It was well water that i used.  Took them directly from a bait pond to the freezer to try it out. Had a small aerator in there only one used for 5-30 gallons, but figured it would be enough. Maybe not enough air.  I will try some lake water from the pond near my house.

FRESHBAIT

  • Guest
Re: DIY Bait Tank
« Reply #25 on: Dec 22, 2012, 08:10 PM »
seeing some scales in the bottom is normal.   From netting them in and out of the tank, bucket, bait trap ect... your gonna rub some scales off,  nothing you can do about it.

Offline pdolewa

  • Team IceShanty Regular
  • ***
  • Posts: 435
Re: DIY Bait Tank
« Reply #26 on: Dec 23, 2012, 06:42 PM »
seeing some scales in the bottom is normal.   From netting them in and out of the tank, bucket, bait trap ect... your gonna rub some scales off,  nothing you can do about it.

Okay good, I wasnt sure if that was the start of them getting soft or not but thank you that is what I was hoping to hear.

Offline needtobefishin

  • IceShanty Rookie
  • **
  • Posts: 15
Re: Bait Tank 101
« Reply #27 on: Dec 25, 2012, 09:16 AM »
Freshbait, this is a great thread, and so is your gravity filter thread. Thank you for providing detailed instructions.

I swear when I was a kid my dad raised minnows year round, not just a holding tank for a week or two. Which is what other places I've read all contend.

In reading your threads it appears to me you are keeping your minnows around as long as you like. Is this correct? I am asking because I just want to be certain  I am understanding everything.

FRESHBAIT

  • Guest
Re: Bait Tank 101
« Reply #28 on: Dec 25, 2012, 12:05 PM »
Needtobefishin,   
  I usually start trapping bait around the end of October with just a few dozen to get every thing kicked off.  I usually start trapping bait seriously by the end of November.  So by the time first ice in December I have about 200 dozen shiners, Dace, fat heads and suckers in the tanks down in the bait shed.  Then it's just a maintenance thing of keeping my stock up so that I have enough bait on hand for family and friends.  I usually give away a lot more than I use especially to kids.  I keep my bait tanks up and running all the way through last ice in late march.  Then knock down a couple tanks just to keep some shiners and smelts for spring trolling.  If I have any bait left by June I take it our back to a large hole I dug with the backhoe that hold water all year and I dump left overs in there.  Most if not all get eaten over the summer by herons, mink etc.  So my tanks usually run 8 months a year. So they tend to be title more than a holding tank.  With the gravity filter you can run it year round and all the maintenance you would have to do is rinse the coarse filter material,  change out the fine filter material when ever it gets extremely dirty. Maybe once every 4 wks.  If when changing the fine filter material you see a bunch of goo over an inch deep in the bottom of bucket pour out the goo.  But don't rinse or disturb bio media to much.   Take the goo and dump on your house plants  dilute with  a couple gallons of water.  Some of the best fertilizer out there. 

Offline needtobefishin

  • IceShanty Rookie
  • **
  • Posts: 15
Re: Bait Tank 101
« Reply #29 on: Dec 25, 2012, 01:42 PM »
Thank you a whole bunch FRESHBAIT...I just knew minnows could be kept longer than a couple of weeks, I just don't like to make statements unless I have some facts to back it up.
When I was a kid my dad raised hundreds of  tropical fish, and my mom loved the "fish water" for her plants..you made me chuckle about that. Also dad used the water on his organic garden...I was the one getting stuck cleaning filters and breaking down tanks

Dad raised minnows in a old washing machine basin he buried in the back yard. Worked great (for me) but he always had issues with the local raccoons..I didn't get around to asking him how he did it before he passed. Now after reading your post I am going to build a set up when the spring arrives.

Thank you very much..oh and he always told me to NOT clean the filters to much or break the tanks to low.. Leave some seed water behind he said.


Iceshanty | MyFishFinder | MyHuntingForum
Contact | Disclaimer | Privacypolicy | Sponsor
© 1996- Iceshanty.com
All Rights Reserved.