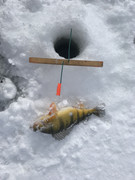
When I started ice fishing again, about 12 years ago, a guy showed me this basic tip up design. I think many might call it a tip down, but anyway, it is one of the home made designs people used out here in Idaho before the equipment revolution. I have made several batches over the years, and thought it might be useful to someone starting out or that had kids to make something quick and dirty to get started. I do like all of the electronics, shelters, and spinning rods, but if you are trying to get started with a family, that is a lot of dough. I still keep a couple of these in my sled in case dead sticks are producing, and I caught a couple on them last week.
The materials:
1x stock. I use 1X8 pine, but it is not too fussy. You will rip it into 3/4x3/4 strips, so any width will do, you just get more strips out of a wider board, which saves some cutting. You will want minimum knots, since a knot in the middle of a strip will probably make that strip break.
Clothesline wire- this is what I use, but anything that is stiff enough that will bend back and forth a few times is ok.
https://www.homedepot.com/p/Everbilt-5-32-in-x-50-ft-Vinyl-Coated-Wire-Clothesline-Green-65025/202957532?NCNI-5Duct tape, for the flag, but again, if you have another idea, give it a try. Dark colors are best for snow.
Tools:
Table saw (again, you might use something else to do the same job)
wire cutters
pliers
hammer
drill press
5/32 drill
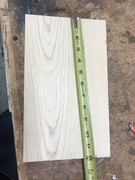
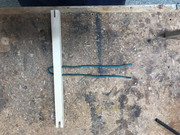
I have a 6 inch auger, so I make mine 12 inches long so they don't get pulled down the hole. If you drill larger holes, you might want to upsize the cross stick accordingly.
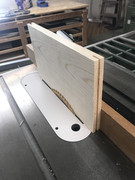
1. Cut a 12 inch length of your 1X material
2. Set your table saw blade to 3/4 inch depth of cut
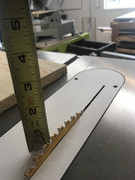
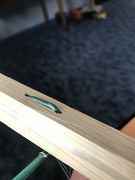
3. Set the fence to slightly off center. You make 2 passes, 1 with each side of the board against the fence, to cut a wider slot. what you are after is a slot wide enough to wind up the line easily.
4. Cut slots on both ends of the 1X- 4 passes total- 1 with each face of the board against the fence on each end of the board.
5. Use the board as a gage to set the fence 1 board thickness from the blade
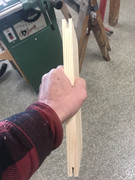
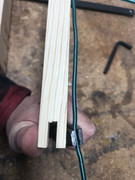
6. Rip the board into as many strips as it will make
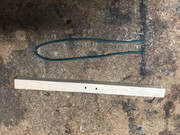
7. Drill 5/32 holes 5-1/2 inches from each end of the strips, through the sides without the notch. I found it quicker to set up a couple of blocks to position the strips for 1 hole, then flip the strip around to make the other, but a hand drill and marking with a ruler would also work.

8. Cut an 18 inch piece of plastic coated clothesline wire
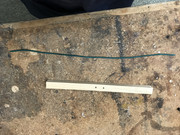
9. Bend in half
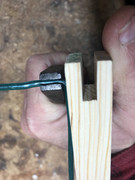
10. Feed through holes
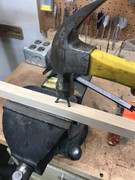
11. Use a hammer to smash the wire flat and into the wood. This side of the wood is against the ice, so it will sit better if the wire is not sticking up too much. It is not terrible if it sticks up, since most of the time the ice is not flat. I used the top of my vice, with the jaws slightly open to let the wires down through, but you could hang the stick over the end of a workbench, or anything with a hole big enough to let the wires down through and support the wood.
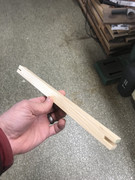
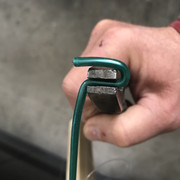
12. Fold the wires to run out to the end of the sticks. Grab 1 wire with your pliers, the end of the pliers even with the end of the stick.
13. Bend up 90 degrees
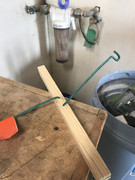
14. Fold the end of the wire back down over your pliers jaws, forming a hook. Your will be different , depending on the shape of your pliers, but that is OK. There will be extra length, cut that off to look like the picture.
15. Cut the other wire off flush with the end of the stick
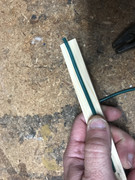
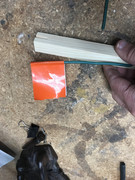
16. Rip off a piece of duct tape for a flag
17. Fold it around the straight wire, as shown>
Rigging: Tie a line to the flag wire, and wrap it around the stick in the grooves you made. Put on at least 10 more feet than the deepest you plan to fish. If you used the dimensions as I did, each wrap of line is 2 feet. Remember that you do not have a drag to fight the fish, so use heavy enough line. Tie on a hook and split shot, or whatever terminal tackle you want. To use, let out the amount of line you want, then from the last notch you use on the stick, go around the flag wire, and spiral out around the other wire, and run the line through the hook.
I usually bend the hook wire up at a 45 degree angle, and the flag wire straight back, so that the fish gets some amount of slack when he tugs and tips the hook end into the hole. You are counting on them to hook themselves is you are not there as they start to bite, so if you watch closely and grab it as it starts to tip over, your chances are better. I still enjoy hand lining fish in- even though a rod and reel are more effective. Often the easiest is to back away from the hole, and keep the line from tangling.
To store, wind the line around the stick in the notches, and stick the hook into the soft wood to hold it.
Fold the flag wire and the hook wire along the stick, and store in your bucket.
I have used these for perch and trout, and they work well. In a 5 gallon pail you can carry at least 30 of them. If your state allows multiple lines, and you have a big group, you could get a lot of action. I have put out 20 of them for 4 people and had people running for bites almost constantly.